Big Mac Turnovers

So this idea came from a video that Mel found, and we decided that these would make an excellent blog post. The original video is for Big Mac pierogies, but since we hadn’t actually made any pastry on this blog (which is named after pastry, in case you didn’t notice), we thought we’d make turnovers instead. To add to the challenge, we thought, ‘why not do everything from videos?’ So we didn’t really use any recipes here, we just threw a bunch of ingredients together and crossed our fingers. Which is totally the best way to cook.

IMG_7161

“I think it’s funny that that’s what you’re doing instead of going online and finding a picture of a Big Mac” -Mel, referring to Laura taking pictures of Big Macs from a McDonalds coupon

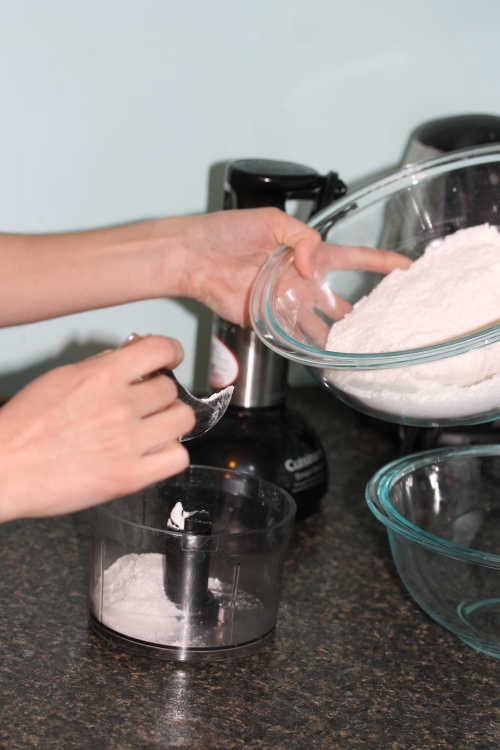
The semi-exception to this was the puff pastry. You don’t really want to guess at ingredient amounts when making pastry. We also didn’t want to spend the entire day making pastry, so we went with a quicker version, rough puff pastry. Our ‘recipe’ only said put equal parts flour and butter and half as much water (we refused to look at the actual recipe part of the post, as that would ruin our fun). Having no idea how much pastry this would make, we went with 12 ounces of butter and flour, and 6 of water.

Since Laura had just gotten cortisol shots in her wrist, Mel was left with the task of cutting the butter into the flour and rolling the pastry. Don’t worry though, Laura kept busy by taking pictures of Mel and other kitchen objects. One of the highlights of the day was when Mel realized she had a soap cutter that might be able to double as a dough scraper. She pulled out the unopened tool only to discover on the label that it was a dough scraper. Huzzah!

“We’ll make the filling while it’s chilling.” -Laura, who is an expert rhymist

Making the rough puff pastry wasn’t too difficult, and soon it was in the fridge, and Laura got to work on the filling. We could tell you how much meat and onion and cheese and things we put in it, but we’re not going to, because that was part of the fun!

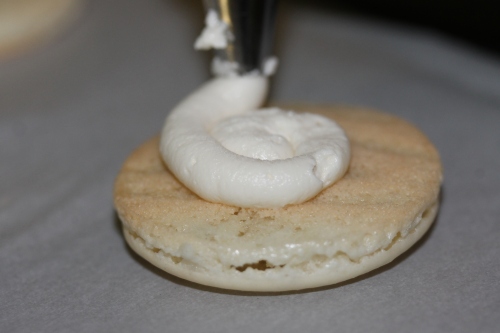
Anyway, it was quickly prepared, and then we had to decide how to package the filling in the pastry. After a lengthy discussion, we agreed to cut the dough into circles and fold them over the filling. Once that was finished, we gave them a quick brush with egg, and popped them in the carefully prepared oven. We did cheat a little here too, and looked up how long to cook puff pastry, and at what temperature, because again, you don’t want to screw that part up.

Onto the sauce, which we made from this video, posted by McDonalds Canada. Again, we eyeballed the ingredients, or as Laura described it: “Big hunk of mayo, smaller hunk of relish, smaller hunk of mustard.” With the sauce prepared, all that was left to do was wait for the turnovers to bake.

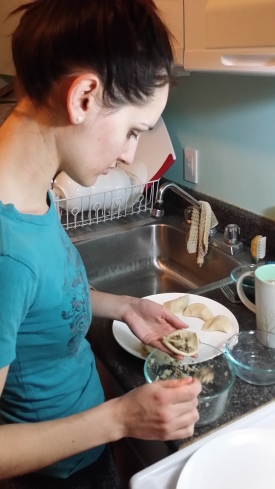
They cooked with no problem, and after cooling for a bit, and doing the customary photo shoot, we got to eat them. They were so good! But like all the other food we’ve made on here, they were very, very rich. A large part of this was due to the rough puff pastry, which was so buttery and good but so filling. Two of these beasts was more than enough of a meal. I think if we were to make them again we might try a lighter pastry, or pierogies, like in the original video. Still, they were super fun to make and tasted great, and that’s what matters!


Edited to add: After making the turnovers, we still had lots of filling left over. Mel and Nic ended up making pierogis with it. They were delicious! Read about how we made them here.

1 Comment

Filed under Uncategorized

Palatable Pierogis

After Laura and Mel made Big Mac turnovers, we still had lots of filling left over. With Nic being distantly Polish, Mel and Nic decided to go the route of the original inspiration for the Big Mac turnovers, and ended up making pierogis with it. We found a recipe for pierogi dough here, and used the remaining filling that Laura and Mel previously made. Nic mixed up the ingredients for the dough, and rolled out the first half, cutting out circles with a glass, and passing them to Mel to fill. Once they were filled, they went right into the frying pan with some onion, until browned. After the first batch, we switched roles.

20160314_191524

Nic working hard to roll out the ever-shrinking dough

This time Mel started to roll out the dough, while Nic filled a few circles that were left from the first batch. The pierogi dough is really elastic, and rolling it out was quite a challenge, as it kept shrinking back to the size it was before each roll. But this stretchy property came in handy while filling the pierogis, as it was very forgiving. However, when Nic tried filling them, he did one and said “how did you do this?” After giving him a few tips, Mel went back to the dough, which she had FINALLY rolled to the desired thickness. After attempting to use a glass to cut out a circle, Nic looked over, saw the struggle on Mel’s face, looked down at his meat-covered pierogis, and gladly asked if Mel wanted to switch back. Mel quickly agreed, and we went back to our original roles, making our dinner frustration free.

20160314_191719

Action shot of Mel expertly filling the pierogis.

The verdict? They’re delicious! They’re obviously richer than potato filled pierogis, but they weren’t sickening as a meal. They were especially delightful when paired with a Big Mac Salad! We used the Big Mac sauce as a salad dressing, and will definitely be making it again!

20160314_193342

The finished product!

2 Comments

Filed under Uncategorized

Fun With Macarons

Our adventure into the treacherous world of macarons began the day before we were going to start baking. Laura was at a club meeting in a cafe, and got a text from Mel. Trying to be polite, she ignored the message, only to receive a frantic call two minutes later. Sure something terrible was happening, Laura rushed out of the meeting and promptly called Mel back.

She was running up and down the Bulk Barn aisles trying to find almond meal, but could only find almond flour. She had called to ask if there was any difference between almond flour and almond meal. I looked it up and found that if there’s a difference it is minimal, so we bought what was there and a crisis was averted.

The day of baking dawned warm and wet, and after a morning workout to prepare for the ingestion of copious amounts of sugar, we got to work. Step one was to procure a kitchen scale, an essential part  of accuracy which is a key part of successful macaron making. Mel magically conjured one out of a drawer, and we were in business.

IMG_7071

The magical scale, as well as the beautiful bowl of egg whites.

The first problem we ran into was the size of our food processor. The almond flour needed to be ground with icing sugar, but the quantities were far greater than capacity of the processor. So we had to do the job in batches, sifting each time, because one recipe we read required it, and an extra sift never hurts.

“I’m spanking it. BAD SIEVE!” -Mel, while sifting

IMG_7077

Mel: “I thought it would be bigger” Laura: “It looks bigger” Mel: “That’s what she said”

While Mel was swapping unground, unsifted almond-sugar mix between a plethora of bowls, Laura got to work beating the egg whites. We had some issues with these too. The egg whites in macarons are supposed to be ‘aged’, meaning they were left out of the fridge overnight.

The problem was that we hadn’t weighed the whites before aging them, which meant that when we weighed them before beating we realized we were about 30g short. We certainly weren’t going to wait another night for a fourth egg to age, so Mel ran it under warm tap water for a while to bring it to room temperature before throwing it in with the rest.

Laura: “It’s so strange that this works as a thing, you know?” Mel: “I do know!” -referring to the fact that beaten egg whites turn fluffy and stiff.

This seemed to work well enough, for the eggs formed stiff peaks with no trouble at all. Then we had to fold in the sifted granulated sugar – gently, because everything you do with macarons should be gentle. But here we ran into a bit of trouble – the two recipes we were following  gave un conflicting advice.

One said to simply fold in the sugar, and the other said to beat it in, until it formed a nice meringue. A more careful read of one of the recipes revealed a step that simply said ‘beat in any flavour or colour at this point’. We took that to mean we could beat the egg/sugar mixture, so we did just that.

IMG_7088

The meringue after beating/folding in the sugar

And then came more folding, when the almond flour was added to the meringue in three stages. Mel and Laura took turns doing this, folding 50 times each addition. It was a lot of folding!

Luckily the next step was an easy one – the batter was supposed to sit for 10-30 minutes. We took this opportunity to wash the many bowls we had used, thanks to our habit of grabbing the wrong sized containers for our ingredients.

Then came the fun part, piping the batter onto baking sheets (lined with parchment paper, of course!). This was all Mel, because Laura is completely useless with a piping bag. After carefully putting the batter onto our prepared templates, and banging the baking sheets to release any air bubbles (a fun but loud step) it was time for another break, to let the macarons dry. This step is a critical one, and gives macarons their characteristic ‘feet’. We spent the time painting, because it seemed like the best thing to do.

We had to wait extra long because the numbers on Mel’s oven are worn off, and so the  only way we could get the right temperature was to fiddle with the knob, wait a while, and then check the oven thermometer. Finally it was ready, and we held our breaths for the  next five minutes as we waited to turn the tray and discover if our macarons were successes or failures. And Lo! We had succeeded. Laura pulled the tray out with a triumphant cry of ‘It’s got da feets!’ and there were celebrations all around.

IMG_7127

Look! They have feet!

Laura: “I don’t know why I’m taking pictures of all of them…” Mel: “Each cookie is important” -After realizing Laura was taking a picture of every cookie Mel iced

Things were not as well as they seemed, however. The first two trays of shells were marvellous, but we encountered some problems with the third. These were undercooked, likely do to the opening and closing of the oven needed for the first two trays. When we tried to peel these off the parchment paper, the outsides came off fine, but the insides were left stuck to the paper.

IMG_7137

Icing action shot!

We solved this problem by filling the empty shells with icing (a simple but lovely buttercream recipe — we added almond flavour) and greedily eating the insides with our fingers. It was very classy.

But finally, we were done, and these guys looked and tasted great. Some were more icing than cookie, but we gave those ones to our friends and saved the good ones for ourselves. Next time we make these we’re hoping to try some flavour and colour decorations — it should be fun. We’ll let you know how it goes!

Here are links to the recipes we used:

Recipe 1 Recipe 2


And here’s some final shots of us enjoying our icing:

Leave a comment

Filed under Desserts

Clementine Challenge Cupcakes

So, Laura had a giant box of clementines at home, and wasn’t going to eat them (because mandarins are by far the superior orange). The solution: bake something with a whole lot of clementines in it.

Laura found a recipe for clementine cupcakes with a clementine curd and clementine icing that looked really good. You can find the recipe here: http://www.pineappleandcoconut.com/recipes/oh-my-darlin-clementine-cupcakes/

We didn’t have ricotta cheese, and we weren’t about to go out and get some for one recipe, so we decided to use an orange cupcake recipe and substitute clementines instead. Here’s that recipe: http://www.myrecipes.com/recipe/orange-cupcakes-with-vanilla-frosting

“Why is it sizzling?” -Mel, as she poured lemon juice into a teaspoon used to measure baking soda.

This one went fairly well, and by that I mean it was a bit of a struggle. First we had to soften the butter, but of course we over-melted it. So into the freezer it went. We took it out about five minutes later to find that instead of hardening the butter had, in fact, melted more. It was the beginning of a long afternoon. When we took out the butter and it had actually hardened, for some reason it had separated. We saved it by whipping it into a fluffy butter, but it was certainly an odd thing. It may have been due to the fact that it was ‘light’ butter, something we discovered much later.

IMG_7012

We forgot to get a picture of the separated butter, so here’s one of a pile of butter. It was used for the meringue frosting.

We had another problem when we realized we had to zest the clementines. Easy, right? Wrong. Have you ever tried to zest a clementine? They are not quite as hard as oranges, and a dull grater simply leads to them being squished beyond recognition.

IMG_6976

“I feel sticky….” -Mel

We tried a sharper, bigger grater, but that cut through the whole peel which was undesirable. Finally Laura got a paring knife and started painfully scraping the zest off. Eventually Laura realized this was far too slow, so she grabbed a potato peeler and started peeling the zest off. It was a little rough at first, but as she honed her technique, she managed to get beautiful shavings. They were too big though, so into the food processor they went. Success!

IMG_6974

“I’m the best clementine zester this side of Kentucky” -Laura

Mel’s job during all this was to get clementine juice from the freshly zested oranges. We don’t have a proper juicer, so a quick knife slit and the oranges were squeezed by hand, leaving an unholy mess. The result of all this was a pile of torn, mangled clementines, sad ghosts of their former selves. But we got enough zest and juice, both for the cupcakes themselves and the custard filling.

IMG_6971

“I don’t like it, Laura!” -Mel (Yes, that is a former orange)

The cupcakes went in the oven with no more mishaps. Hooray!

IMG_6997

Laura: “It doesn’t make very much, does it?” Mel: “No…” Laura: “It only makes twelve…” Mel: “What?” Laura: “I didn’t read the recipe…”

Next came the custard. This part was fun. We used a makeshift double boiler, but Laura turned the heat down too low so for a long time a very frothy, very liquidy egg mixture was just sitting on top of warm water. Once we got the double boiler actually boiling, things went much better. Into the fridge the custard went and we took a break for dinner.

“Oh, that’s not a small bowl. Whatever, I don’t care.” -Laura, upon using a giant bowl when the recipe called for a small one. “Whatever, I don’t care” became our slogan for the afternoon.

After dinner Mel cut out cones from the cupcakes so she could fill them with custard, and Laura set to work on the meringue icing. Mel was too afraid to cut deep into the heart of the cupcakes, so ended up having to scrape out the insides with a paring knife. It left a lovely pile of crumbs which soon disappeared without us noticing. We didn’t end up flavouring the meringue with oranges because we ran out of clementines, so we used this recipe: http://allrecipes.com/recipe/150741/easiest-most-delicious-meringue-buttercream/

This went well. Surprisingly so. The key here is to not give up, and keep mixing the meringue and the butter, even if it’s soupy. Even if it’s chunky. It came together, unbelievably well in the end.

IMG_7018

“I’m going to do it, you have no faith!” -Mel (about the buttercream not coming together)

Then Mel set about piping icing on the cupcakes, as Laura is hopelessly useless at decorating. The things came out beautifully, and then it was time for the taste test.

They were amazing. The icing is very rich and sweet, which is balanced by the tartness of the custard. These would have been tasty without the custard, but the filling really brought everything together. They’re very, very rich though, so I’d suggest only eating one a day. Also our cupcakes were quite high, so biting into them invariably left one with frosting on the nose. Which isn’t necessarily a bad thing, since you can save that for a snack for later.

IMG_7032

So beautiful, in the end.

Overall, these were very tasty, though they were not a cake walk (pun intended). We started making them around three, and finished at seven. Mind you, the custard had to set, and it can be made in advance. Having a proper zester and juicer would also probably speed things up.

IMG_7052

The two remaining clementines in the house after this (mis)adventure.

IMG_7067

The final product, cut open to show the custardy goodness.


Leave a comment

Filed under Desserts